Imagine walking into your kitchen on a quiet weekend morning and being greeted by the most wonderful aroma of fresh baking that instantly makes you feel warm and safe. This article is all about creating the ultimate homemade soft bread buns from scratch using simple techniques that anyone can master in their own home kitchen. Many people feel completely intimidated by the thought of working with yeast because they worry their dough will not rise or that their bread will turn out as hard as a rock. This recipe completely removes all those fears by breaking down the traditional process into very easy steps that guarantee a pillowy, cloud like texture every single time. You do not need any expensive commercial equipment or a fancy professional mixing machine to achieve bakery quality results because your own two hands and a bit of patience are more than enough to create something truly spectacular.
People absolutely love this recipe because it brings back the authentic taste of old fashioned bread that has completely disappeared from modern grocery store shelves. When you buy pre packaged rolls from the supermarket you are often consuming a long list of chemical preservatives and artificial softeners that are designed to keep the bread sitting on a shelf for weeks. This homemade version relies entirely on the natural magic of fermentation and simple ingredients to create a sweetness and elasticity that leaves everyone at your dinner table completely speechless. Kids love squeezing these buns because they are unbelievably soft and bouncy, while adults appreciate the pure clean taste that pairs beautifully with both sweet jams and savory dinner fillings. It is the kind of recipe that makes people feel deeply cared for because they can taste the time, love, and effort that you poured into kneading the dough.
You should make these delightful bread rolls whenever you want to elevate a simple family dinner into a memorable festive occasion or when you need a creative cooking project to clear your mind after a stressful week. There is a deep emotional satisfaction that comes from watching a simple bowl of flour and water double in size and transform into a beautiful golden brown masterpiece right before your eyes. They are the perfect addition to a cozy winter soup night when you want something warm and comforting to soak up the leftover broth from your bowl, or for a bright summer backyard barbecue where you want to surprise your friends with the ultimate hamburger buns. Sometimes we bake because we want to express love to our family without saying a word, and serving a basket of steaming hot, freshly baked rolls with a pat of melting butter is the greatest way to do exactly that.
Learning the traditional art of bread making is also a fantastic way for absolute beginners to connect with basic culinary history and build real confidence that carries over into all other areas of cooking. You will quickly learn how to listen to your dough, feel its changing texture under your palms, and understand how simple natural elements like warmth and time work together to create structure. This recipe gives you total control over what your family eats because you can choose to use high quality organic ingredients without any hidden sugars or industrial hydrogenated oils. Whether you are a young student learning to cook for yourself in a small apartment or a parent looking for a fun weekend activity to share with your children, these soft buns will quickly become a legendary staple in your household menu.
Ingredients You Will Need
-
All Purpose Flour: 4 cups (gently spooned into the measuring cup and leveled off)
-
Active Dry Yeast: 2.25 teaspoons (one standard small paper packet)
-
Warm Water: 1.25 cups (ensure the temperature feels comfortable like bath water, not hot)
-
Granulated White Sugar: 3 tablespoons (this helps activate the tiny yeast organisms)
-
Unsalted Butter: 4 tablespoons (melted completely and cooled down to room temperature)
-
Large Egg: 1 egg (kept at room temperature before mixing into the dough)
-
Fine Sea Salt: 1.5 teaspoons (critical for developing the deep structural flavor of the bread)
-
Whole Milk: 2 tablespoons (used at the very end to brush the tops of the unbaked rolls)
-
Sesame Seeds: 1 tablespoon (optional ingredient for sprinkling on top for a beautiful crunch)
Step by Step Method
Step 1: Activate the Yeast
Begin by pouring your one and a quarter cups of warm water directly into a large mixing bowl. Add the three tablespoons of granulated white sugar and your packet of active dry yeast into the water. Stir the mixture gently with a spoon and let it sit undisturbed on your counter for about ten minutes until a thick, frothy foam forms on top, which proves your yeast is alive and ready to work.
Step 2: Combine the Liquid Ingredients
Once your yeast mixture looks nice and bubbly, pour in your four tablespoons of melted and cooled unsalted butter. Crack your room temperature large egg directly into the bowl and use a fork to whisk the liquids together gently until the egg yolk is completely broken and integrated into the yeast water.
Step 3: Add Flour and Salt
Measure out your four cups of all purpose flour carefully and pour them into the liquid mixture along with the one and a half teaspoons of fine sea salt. Use a large wooden spoon to stir everything together starting from the center of the bowl and moving outward until a shaggy, sticky dough begins to form and no dry white patches of flour are left at the bottom.
Step 4: Knead the Dough Tightly
Sprinkle a handful of extra flour over a clean kitchen countertop or a large cutting board. Tip your sticky dough out onto the floured surface and begin kneading it with the heels of your hands by pushing the dough forward, folding it back over itself, and turning it ninety degrees continuously. Continue this rhythmical kneading process for ten full minutes until the dough transforms from a rough sticky mass into a beautifully smooth, stretchy, and silky ball.
Step 5: Allow the First Rise
Take a separate clean large bowl and grease the inside surfaces with a tiny bit of oil or extra butter. Place your smooth ball of dough into the greased bowl and turn it over once so the top of the dough is lightly coated in oil to prevent a dry crust from forming. Cover the bowl tightly with a clean damp kitchen towel and place it in a warm, draft free corner of your kitchen for one hour until the dough doubles in size.
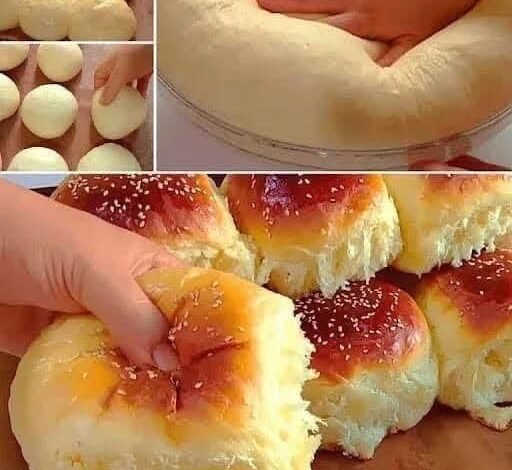
Step 6: Shape the Individual Buns
After one hour has passed and your dough has grown beautifully large, gently press your fist into the center of the dough to deflate the trapped air bubbles. Tip the dough back onto your counter and use a sharp knife or a bench scraper to divide the large mass into eight equal pieces for large buns or twelve equal pieces for smaller dinner rolls. Roll each piece under your cupped palm in a circular motion against the counter until it forms a perfect, smooth, tight little sphere.
Step 7: Arrange for the Second Rise
Line a large baking sheet with a piece of parchment paper to ensure your bread does not stick to the metal. Place your shaped dough spheres onto the parchment paper, leaving at least two inches of space between each roll so they have plenty of room to expand outward. Cover the baking sheet loosely with your kitchen towel and let them rise a second time for thirty five minutes until they look puffy and fat.
Step 8: Apply the Milk Wash
While your rolls are finishing their second rise, preheat your kitchen oven to 375 degrees Fahrenheit, which is about 190 degrees Celsius. Just before placing the baking sheet into the hot oven, take a pastry brush and gently paint the top of each puffy roll with your two tablespoons of whole milk. If you want a classic bakery look, sprinkle your sesame seeds evenly over the wet milk surface right now.
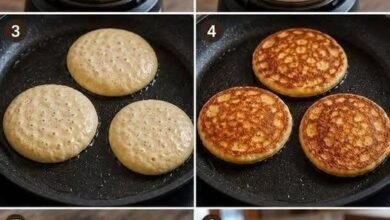
Step 9: Bake to Golden Perfection
Slide the baking sheet onto the middle rack of your preheated oven and let the rolls bake for fifteen to eighteen minutes. Watch them closely through the oven window until the tops turn a gorgeous, rich golden brown color. You can double check if they are done by gently tapping the bottom of a bun, it should sound slightly hollow when fully baked through.
Step 10: Cool and Serve Warm
Carefully remove the hot baking sheet from your oven using thick oven mitts and place the buns onto a wire cooling rack on your counter. If you want an extra soft outer crust, you can rub a solid stick of cold butter over the hot tops of the buns right now. Let them cool down for ten minutes before slicing them open to serve with your favorite dinner dishes.
Why This Recipe Is Special
This soft bread bun recipe is an absolute treasure because it strips away all the unnecessary chemical complexities of modern commercial baking and returns to the pure, honest roots of traditional bread making. In the commercial food industry, factories use artificial dough conditioners, enzymes, and bleaching agents to force bread to rise fast and stay soft on trucks during transport. This recipe proves that you can achieve an even better, lighter, and more delicate texture naturally by simply allowing the yeast to take its time to break down the starches inside the flour. This slow natural process makes the final bread much easier for the human stomach to digest, meaning you will not experience that uncomfortable, heavy bloating sensation that often happens after eating processed store rolls.
From a flavor standpoint, this recipe is a true masterpiece because it strikes a perfect harmonious balance between rich dairy sweetness and clean savory notes. The addition of a whole egg and melted unsalted butter introduces healthy fats into the gluten structure, which creates what bakers call an enriched dough. These fats coat the flour strands perfectly, preventing them from becoming tough or chewy, which is the exact secret behind that melting, pillow like texture that everyone craves. The light sweetness from the sugar does not make the bread taste like a dessert, instead it acts as an enhancer that amplifies the natural nutty aroma of the baked wheat.
The versatility of these buns is another reason why this specific recipe is so uniquely special for home cooks. Because the flavor profile is kept classic and balanced, you can use these exact same rolls for a wide variety of meals throughout your week. You can slice them open in the morning and toast them with sweet strawberry jam for breakfast, pack them with turkey and cheese for a healthy school lunchbox, or serve them alongside a heavy Sunday roast dinner to soak up the rich gravy. It is a single, foundational recipe that empowers you to handle multiple meal situations with complete confidence and ease.
Extra Tips for Better Taste
To ensure your bread turns out spectacularly soft every single time you attempt this recipe, you must pay close attention to the temperature of the water you use to bloom your yeast. If your water is too cold, the tiny yeast organisms will stay asleep and your dough will refuse to rise, but if the water is too hot, it will instantly kill the yeast and leave you with a flat dense brick of dough. A good trick is to test the water on the inside of your wrist, it should feel comfortably warm like a gentle baby bath.
If you want to give your buns an incredibly luxurious, glossy, and shiny golden appearance, you can substitute the milk wash for a traditional egg wash. Simply beat one whole egg with one tablespoon of water in a small cup until smooth, then brush this liquid over the risen dough spheres just before they slide into the oven. The natural proteins and fats inside the egg yolk will caramelize beautifully under the heat, creating a stunning dark golden sheen that looks like it came from an expensive French pastry shop.
For those who love a savory garlic twist on their dinner rolls, you can melt two extra tablespoons of butter in a small pan while the bread is baking and mix in half a teaspoon of garlic powder and a pinch of dried parsley. The very second your buns come out of the hot oven, paint this warm garlic butter generously over the top of the crust to let the bread absorb the rich aromatic oils while it cools down.
Always try to use a kitchen scale or the spoon and level method when measuring your flour instead of scooping the measuring cup directly into the flour bag. Scooping directly packs the flour down tightly into the cup, which means you will accidentally add too much flour to your bowl and end up with a dry, heavy dough that refuses to become soft and fluffy.
Final Thoughts
Baking your own bread at home is one of the most therapeutic, grounding, and rewarding skills that you can bring into your modern lifestyle. This simple soft bread bun recipe shows us that with just a few basic ingredients from our pantry and a little bit of physical movement, we can create food that brings immense comfort and joy to our loved ones. It teaches us to slow down, trust the natural process of growth, and take pride in creating things with our own two hands rather than always relying on convenient factory made items. As you pull a hot, golden roll apart and watch the steam rise from its pillowy soft center, you will realize that nothing in the world can ever match the pure magic of a warm kitchen filled with homemade bread.
Nutrition Details
The nutritional estimates provided in the table below are calculated for one single large bread bun based on dividing the total dough batch into eight equal pieces.
| Nutrient Type | Amount Per Serving |
| Calories | 270 calories |
| Total Fat | 7 grams |
| Saturated Fat | 4 grams |
| Carbohydrates | 44 grams |
| Dietary Fiber | 2 grams |
| Sugars (Natural and Added) | 5 grams |
| Protein | 7 grams |
| Sodium | 440 milligrams |
Disclaimer
Please keep in mind that every individual human body possesses its own unique metabolic rate, digestive sensitivities, and overall nutritional requirements. This traditional bread recipe contains standard wheat flour and dairy products, which may not be suitable for individuals with gluten intolerance, wheat allergies, or lactose sensitivities. If you are managing a specific health condition like celiac disease or diabetes, you should consult with a medical professional or a registered dietitian before introducing baked flour products into your regular diet. The nutritional values printed in this guide are close mathematical estimations meant for general tracking purposes and can vary depending on the specific ingredient brands and exact portion sizes you create in your kitchen.