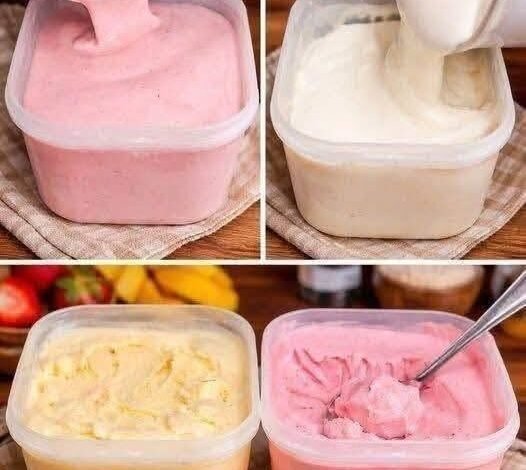
Making your own frozen desserts at home can often feel like a very hard task because most traditional recipes ask for expensive kitchen equipment like dedicated electric makers or fancy attachments. However, this amazingly simple treat completely changes the game by giving you a way to create rich and creamy treats right in your own kitchen using only a few basic ingredients that you likely already have sitting in your pantry or refrigerator. The core secret behind this fantastic culinary method relies on a clever combination of two everyday staples that work together to create a light and velvety structure without any complex mechanics. By using heavy whipping cream alongside sweetened condensed milk, you can easily capture the exact same smooth texture and luxurious feel that you would normally expect from an expensive specialty shop down the street. It is a brilliant approach that removes all the usual stress and technical hurdles, allowing absolutely anyone to become an instant dessert chef regardless of their past culinary experience or the size of their kitchen setup.
People all over the world absolutely adore this particular style of making frozen treats because it offers an incredible amount of convenience without sacrificing even a single bit of genuine flavor or creamy quality. When you order standard commercial options from local supermarkets, you often end up consuming a long list of artificial additives, chemical stabilizers, and unnecessary preservatives that are only added to prolong shelf life during shipping. By choosing to make your own batch right on your kitchen counter, you regain total control over every single component that goes into your body, ensuring that your family gets to enjoy a pure and wholesome treat. Furthermore, the sheer flexibility of this basic base allows you to express your culinary creativity in endless fun ways, whether you want to swirl in fresh summer berries, mix in crunchy chocolate bits, or fold in crushed chocolate cookies for extra texture. It is a joyous process that brings immediate satisfaction to both beginner cooks and seasoned bakers alike, making it a beloved staple in modern home kitchens.
There are so many wonderful moments throughout the year when preparing this cool and refreshing treat becomes the absolute highlight of your day or week. During the intense heat of hot summer afternoons, having a cold metal container filled with delicious velvety sweetness waiting in your freezer brings an instant wave of comfort and happiness to your entire family. Beyond simply beating the warm weather, making this recipe is a fantastic emotional activity that brings parents and children together in the kitchen for fun weekend baking projects that create lasting memories. It also serves as a great choice for fitness enthusiasts who want to customize their sweet snacks by using low fat dairy alternatives, reduced sugar ingredients, or adding scoops of their favorite protein powders to fit their daily health goals. Whether you are celebrating a special birthday party with close friends or simply looking for a soothing nightcap after a long work week, this simple creation satisfies your late night cravings with zero hassle.
Taking the time to craft your own homemade treats allows you to build a deeper connection with the food you consume while saving a significant amount of money over time. Purchasing high quality artisanal pints from local gourmet stores can quickly become very expensive, especially if you have a large family with big appetites for sweet afternoon snacks. By purchasing simple bulk ingredients from your local grocery aisle, you can make large batches that last for weeks at a portion of the original cost while maintaining complete control over food safety and cleanliness. The overwhelming sense of pride you feel when you scoop out a perfectly formed ball of sweet cream that you built from scratch using your own hands is truly unbeatable. This recipe stands as a true testament to the fact that modern cooking does not need to be complicated, stressful, or expensive to yield absolute world class results that leave everyone asking for second servings.
Ingredients You Will Need
To prepare this rich and velvety treat, you only need a few simple components that are easy to find at any local grocery store. Here is the complete list of everything you need to gather before starting:
-
Two cups of heavy whipping cream with at least thirty six percent milk fat, kept extremely cold in your refrigerator until the moment you use it
-
One can of sweetened condensed milk, which equals fourteen fluid ounces or about three hundred and ninety seven grams
-
Two teaspoons of pure vanilla extract for a deep and classic warm aromatic flavor
-
One pinch of fine sea salt to balance out the sweetness and highlight the rich dairy notes
-
Optional mix in items such as one cup of crushed chocolate sandwich cookies, half a cup of fresh fruit puree, or half a cup of mini chocolate chips
Step by Step Method
Creating this delicious frozen treat is a completely stress free process that requires no complex technical skills. Follow these clear and simple instructions to achieve a perfectly smooth and scoopable batch every single time:
Preparing Your Tools and Equipment
Before you begin mixing your ingredients together, it is a great idea to spend a few minutes prepping your kitchen tools. Take a large glass or metal mixing bowl and place it into your refrigerator or freezer for about fifteen minutes along with your metal whisk beaters. Cold equipment helps your heavy cream whip much faster and holds more air inside the liquid mixture. You should also select a deep metal loaf pan or a safe plastic container with a tight fitting lid and set it aside on your clean kitchen counter.
Whipping the Heavy Cream
Take your cold heavy whipping cream out of the refrigerator and pour two full cups directly into your pre chilled mixing bowl. Using a hand held electric mixer or a sturdy wire whisk, beat the cream on medium speed for a few minutes. Watch carefully as small bubbles form and the liquid begins to thicken up into a light fluffy texture. Continue beating until stiff peaks form, which means when you lift your beaters straight up out of the bowl, the cream holds its pointed shape without falling back down into the bowl.
Combining the Sweetened Base
In a separate medium sized bowl, open your can of sweetened condensed milk and pour it all out. Add two teaspoons of pure vanilla extract and one small pinch of fine sea salt directly into the condensed milk. Stir these three items together thoroughly using a flexible rubber spatula until the vanilla is fully blended into the thick milk base. The salt might seem like an unusual addition, but it is essential because it cuts through heavy sugar levels and brings out the natural richness of the dairy.
Folding the Ingredients Gently
Now comes the most critical step in the entire process to ensure your end result stays soft and creamy instead of dense and hard. Take about one third of your whipped heavy cream and gently stir it into your bowl of sweetened condensed milk to lighten the mixture up. Next, pour all of that lightened mixture back into the large bowl holding the remaining whipped cream. Use your rubber spatula to carefully fold the ingredients together using slow circular down and over motions. Do not stir rapidly or beat the mixture, because you want to keep all the trapped air bubbles inside the cream.
Adding Your Favorite Flavors
If you want to keep your batch simple and classic, you can skip this step entirely and enjoy a pure vanilla flavor. However, if you want to add extra texture or fun flavors, this is the exact moment to fold them into your smooth white base. Gently throw in your chosen items like crushed chocolate cookies, peanut butter swirls, fresh berry jams, or chopped toasted nuts. Lightly turn the spatula two or three times just to evenly distribute your additions throughout the white cream without deflating the fluffy structure you just built.
Transferring and Freezing
Gently pour your finished creamy mixture into your prepared metal loaf pan or plastic container, using your rubber spatula to scrape every last drop out of the bowl. Smooth out the top surface using the back of a large spoon or a flat spatula so it looks clean and neat. Place a sheet of parchment paper or plastic wrap directly onto the surface of the cream to prevent any ice crystals from forming on top. Put the container into the coldest section of your freezer and let it sit undisturbed for at least six hours, or preferably overnight for the best scoopable texture.
Serving Your Creation
Once the minimum freezing time has passed, pull your container out of the freezer and let it rest on your counter for about three to five minutes at room temperature. This brief rest period softens the outer edges just enough to make scooping effortless. Dip a metal scoop into warm water, wipe off the excess drops, and glide it smoothly across the surface to form beautiful round balls. Serve immediately in chilled glass dishes or crispy waffle cones for a delightful homemade snack.
Why This Recipe Is Special
This specific preparation method stands out from traditional recipes for a huge variety of practical and health related reasons that appeal to modern home cooks:
-
No expensive kitchen equipment or specialized gear is required, saving you money and saving valuable storage space in your kitchen cabinets
-
You have absolute control over every single ingredient, allowing you to eliminate unwanted chemical additives, artificial colors, and synthetic flavorings
-
The preparation time takes less than fifteen minutes from start to finish, making it an ideal option for busy parents and working adults
-
It offers a naturally high level of calcium and wholesome fat energy from fresh dairy, supporting healthy bones when enjoyed as part of a balanced diet
-
You can easily modify the base to suit specific nutritional choices, such as using dairy free coconut creams or natural low calorie milk options
-
The texture remains exceptionally soft and velvety straight from the freezer because sweetened condensed milk lowers the freezing point of water inside the cream
Extra Tips for Better Taste
If you want to elevate your sweet creation from a simple everyday snack to a gourmet restaurant level treat, consider these creative improvement tips:
Chill Everything Thoroughly
Cold temperatures are your absolute best friend when working with fresh dairy creams. Always keep your heavy cream in the coldest part of your refrigerator until the exact second you pour it into your bowl. Chilling your metal bowl and mixing beaters in the freezer for twenty minutes before starting makes a huge difference in how much volume your whipped cream achieves.
Use High Quality Extracts
Since this simple recipe relies on very few core components, the quality of your flavorings makes a massive impact on the final taste. Instead of using artificial vanilla flavoring, invest in pure vanilla extract or genuine vanilla bean paste. The small black specks from real vanilla beans add a beautiful visual appeal alongside a rich woody aroma that artificial options simply cannot match.
Experiment with Creative Swirls
Rather than fully mixing your flavor additions into the white base, try swirling them through the cream right before freezing. Drizzle ribbons of warm caramel sauce, chocolate fudge, or tart raspberry puree over the top of the poured cream in your loaf pan. Use a butter knife to gently draw figure eight patterns through the mixture, creating gorgeous visual ribbons and flavor contrasts in every scoop.
Toast Your Crunchy Additions
If you love adding chopped almonds, walnuts, pecans, or coconut flakes to your frozen treats, always take five minutes to toast them in a dry skillet over medium heat first. Toasting releases the natural oils inside nuts, making them far more aromatic and keeping them super crispy even after spending several days inside a freezing environment. Always let toasted items cool completely down to room temperature before folding them into your cold cream base.
Nutrition Details
Understanding the nutritional profile of your food helps you make balanced lifestyle choices while still enjoying wonderful treats. Here is an estimated breakdown for a standard recipe batch along with details per individual serving size based on an eight serving yield:
Whole Batch Overview
| Nutritional Component | Total Amount per Whole Batch |
| Total Energy | 3120 Calories |
| Total Fat | 204 Grams |
| Saturated Fat | 128 Grams |
| Cholesterol | 710 Milligrams |
| Sodium | 480 Milligrams |
| Total Carbohydrates | 280 Grams |
| Dietary Fiber | 0 Grams |
| Total Sugars | 272 Grams |
| Protein | 42 Grams |
Single Serving Breakdown
| Nutritional Component | Amount per Single Serving |
| Serving Size | Half Cup or approx 100g |
| Total Energy | 390 Calories |
| Total Fat | 25.5 Grams |
| Saturated Fat | 16 Grams |
| Cholesterol | 88.7 Milligrams |
| Sodium | 60 Milligrams |
| Total Carbohydrates | 35 Grams |
| Dietary Fiber | 0 Grams |
| Total Sugars | 34 Grams |
| Protein | 5.25 Grams |
Disclaimer
Please keep in mind that every human body is completely unique, and individual nutritional needs or dietary reactions can vary widely from person to person. The nutritional values provided in this article are simple estimates based on standard commercial ingredients and standard measurements. If you have specific dietary restrictions, dairy allergies, sugar sensitivities, or underlying health conditions, please consult with a qualified medical professional or certified nutritionist before adding new rich treats to your regular routine.
Final Thoughts
Making high quality sweet treats at home does not require complicated gadgets, culinary degrees, or hours of exhausting manual labor in the kitchen. With just two main ingredients and a few simple steps, you can create an exceptionally rich and satisfying dessert that rivals your favorite local ice cream shop. Gather your simple ingredients, chill your mixing bowl, and give this fun recipe a try today to bring a huge smile to your family and friends.